Last Updated on April 10, 2026 by Don Gerig, RDCS
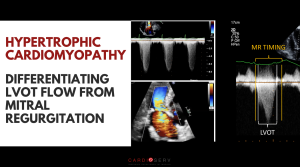
In part 1 of our hypertrophic cardiomyopathy (HCM) series, we reviewed the key echocardiographic clues that should raise suspicion for hypertrophic cardiomyopathy. In part 2, we focused on how to differentiate LVOT obstruction flow from mitral regurgitation.
Now, in this third and final article, we’ll cover one of the most important ways to unmask obstruction that may not be present at rest: goal-directed valsalva.
In obstructive HCM, a patient may have little to no gradient at rest, then develop a significant obstruction within seconds under the right conditions.
This is why relying on resting images alone can lead to missed or underestimated LVOT obstruction gradients.
The solution?
A more consistent and reproducible approach to valsalva
Why Valsalva Matters in Obstructive Hypertrophic Cardiomyopathy

Obstructive HCM is not a static condition. It’s dynamic, meaning the degree of obstruction changes continuously with physiologic conditions.
LVOT obstruction is influenced by:
- Preload
- Contractility
- Intrathoracic pressure
When preload decreases, the left ventricular cavity becomes smaller, bringing the mitral valve and septum closer together. This increases the likelihood of systolic anterior motion (SAM) and LVOT obstruction.
The valsalva maneuver takes advantage of this physiology.
By performing the valsalva maneuver and reducing preload, we can:
- Increase LVOT gradients
- Reveal obstruction not seen at rest
- Clarify the severity of the disease
A Moment to Pause
You work your way through the echo protocol.
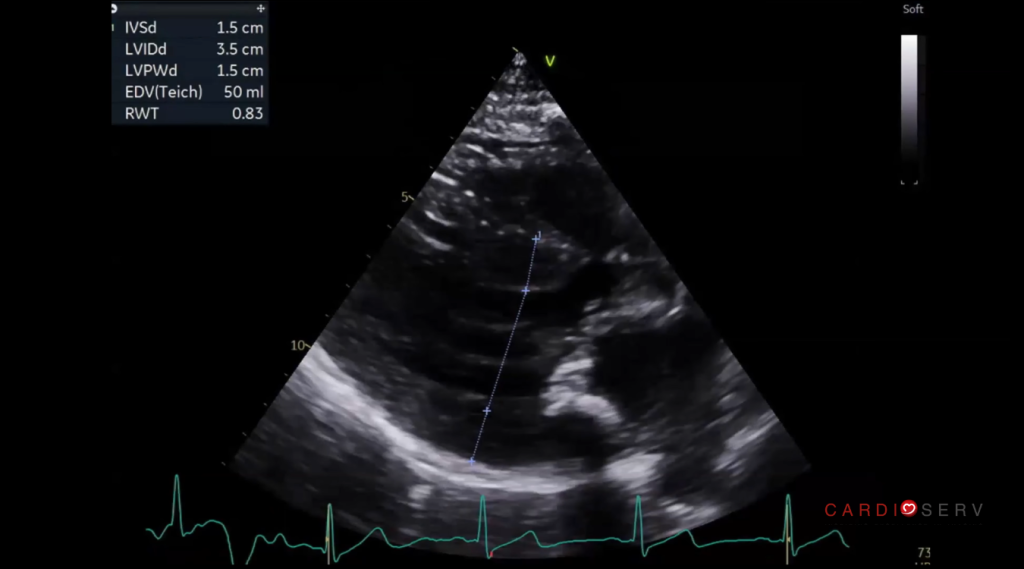
In the PLAX view you note that the septum is thickened and the LV is small and hyperdynamic. You suspect SAM and notice what looks like turbulent flow in the LVOT with color Doppler.
When you PW the LVOT in the Apical 5 chamber view you notice a mildly increased gradient.
This is the moment to pause.
But remember, this is a dynamic process.
The resting gradient may not reflect the true maximum gradient the patient experiences during daily activity.
You want to see if the obstruction worsens so you ask the patient to “bear down” and perform a valsalva maneuver.
Note: Always follow institutional protocols and patient safety considerations when performing provocative maneuvers.
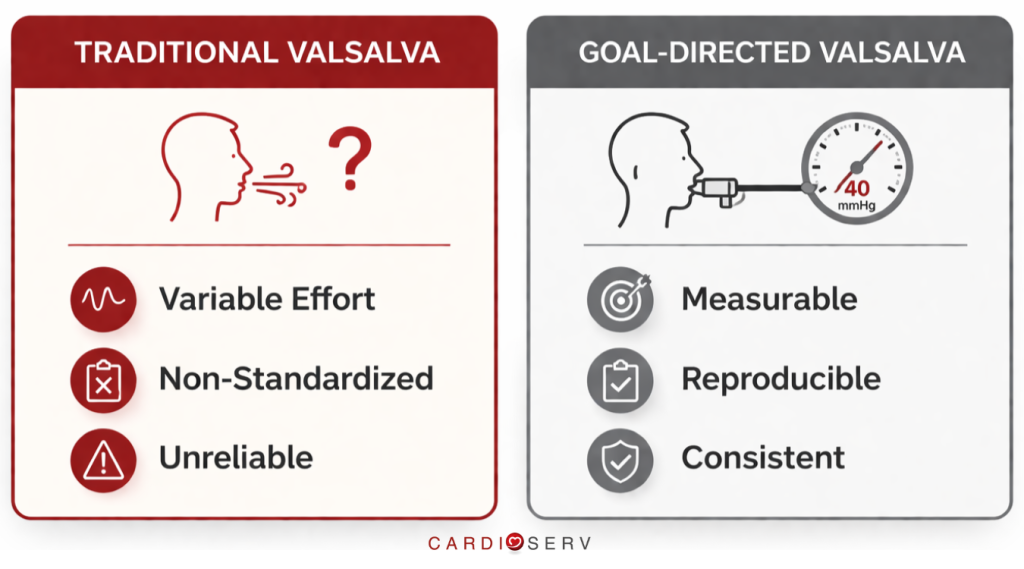
The Problem With Traditional Valsalva

Most labs already attempt valsalva but the results are often inconsistent.
Why?
Because traditional valsalva is:
- Unquantified
- Patient-dependent
- Difficult to reproduce
- Non-standardized
In addition, some patients have a difficult time performing a correct valsalva. Some patients don’t bear down enough, or not long enough while others can be too aggressive and overdo it. The reality is that many patients do not clearly understand what is being asked.
The result: unreliable gradients and missed findings.
With goal-directed valsalva, most of these issues can be solved. Let’s look at what this is and how it differs from traditional valsalva.
What Is Goal-Directed Valsalva in HCM?
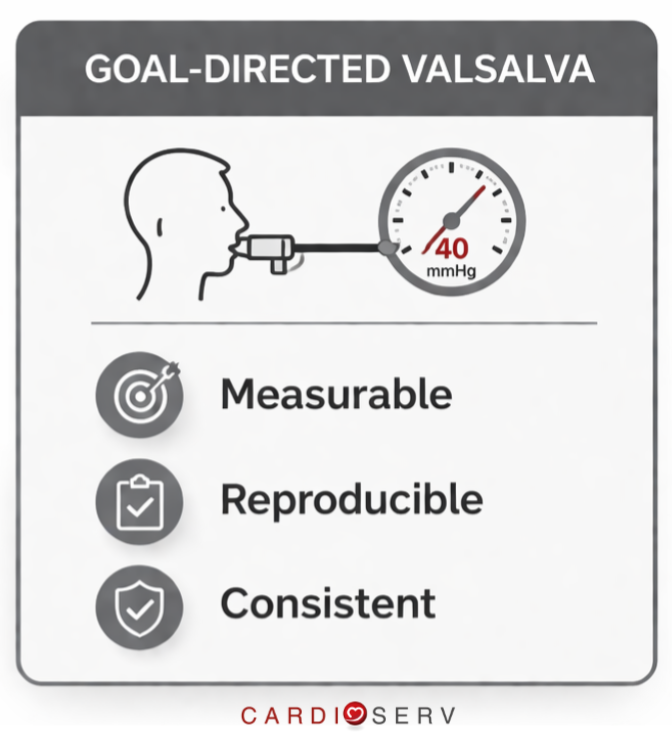
Goal-directed valsalva is a simple modification that makes the valsalva maneuver measurable, reproducible and standardized.
Instead of giving the patient instructions to “bear down,” you give them a target to aim for.
Typically, this involves:
- Having the patient “blow” into a device
- Maintain a specific pressure (commonly around 40 mmHg)
- Hold that pressure consistently for 10 seconds.
This transforms valsalva from a guess…into a controlled and standardized physiologic test that can be used consistently across patients, labs, and sonographers.
Why Goal-Directed Valsalva Works Better
Goal-directed valsalva improves your study in three key ways:
1. Consistency
Every patient is performing the maneuver at a similar effort level.
2. Reproducibility
You can repeat the maneuver and expect similar physiologic effects.
3. Diagnostic Confidence
When an obstruction gradient increases, you know it’s real and not just variability in effort.
How to Set Up a Goal-Directed Valsalva Device in Your Lab
The good news is that you likely already have everything you need in your echo lab to perform goal-directed valsalva.
This does not require a specialized device.
In many cases, it can be set up using standard supplies already available in your department.
A goal-directed device setup can be as easy as:
- Standard oxygen tubing
- A manometer or pressure gauge
- A mouthpiece or syringe with plunger removed (optional)
- Connectors (if needed)
Connect the oxygen tubing to the pressure gauge. The patient blows into the other end of the oxygen tubing. The pressure gauge should remain visible to both the patient and sonographer so the target pressure can be maintained throughout the maneuver. To make it even easier for the patient, you can remove the plunger from a syringe and connect the syringe to the patient-end of the tubing, which they can use as a mouthpiece.
The goal is to create a setup that allows the patient to blow against resistance while maintaining a target pressure, typically around 40 mmHg for 10 seconds.
This gives both the sonographer and the patient a clear visual target.
Instead of asking the patient to simply “bear down,” you can now coach them to maintain a measurable and reproducible pressure.
This makes the maneuver far more standardized and reliable.
CardioServ Tip:
Before beginning the study, test the setup yourself to ensure the pressure target is easy to read and the patient can comfortably maintain it.
How to Perform Goal-Directed Valsalva
Here’s a quick and simple approach you can implement in your lab:
1: Prepare the Patient
- Explain the goal clearly
- Demonstrate the maneuver if necessary
- Ensure they understand they will need to maintain steady pressure for 10 seconds
2: Use a Target
- Have the patient blow into a device that provides pressure feedback
- Aim for a consistent pressure target (e.g., ~40 mmHg)
- Encourage steady effort, not a quick burst
3: Image During the Maneuver
- Acquire CW Doppler across the LVOT
- Capture the waveform during pre, peak and post strain
- Watch for changes in gradient and waveform shape
Protocol Tip:
Always annotate the Doppler tracing as “resting” or “valsalva” to avoid confusion during interpretation and reporting.
4: Compare to Resting Values
- Evaluate differences in peak velocity and gradient
- Look for the development of a late-peaking (dagger-shaped) signal
- Identify changes consistent with dynamic obstruction
What to Look For
When goal-directed valsalva is performed correctly, you may see:
- A significant increase in LVOT velocity
- Development of a late-peaking systolic waveform
- Clear evidence of dynamic obstruction
In some cases, a patient with a mild or absent gradient at rest may demonstrate a severe gradient with provocation.
When Is Obstruction Significant?
Once you’ve obtained the resting and provoked LVOT gradients, the next question is:
When does it become clinically significant?
In hypertrophic cardiomyopathy, an LVOT gradient ≥30 mmHg at rest or with provocation is widely used to identify obstructive physiology.
A gradient ≥50 mmHg at rest or with physiologic provocation is generally considered hemodynamically significant and is the threshold most often used to guide management decisions, particularly in symptomatic patients.
Key thresholds
- ≥30 mmHg = obstruction present
- ≥50 mmHg = clinically significant obstruction
This distinction is important.
A patient may have little to no resting gradient, yet develop a significant provoked gradient during goal-directed Valsalva or exercise.
This is why provocation is so valuable in HCM imaging.
Clinical Context Still Matters
The gradient should never be interpreted in isolation.
Always consider:
- patient symptoms
- SAM severity
- mitral regurgitation
- loading conditions
- whether the gradient is resting or provocable
These thresholds are consistent with ASE-aligned echocardiographic practice standards.
Common Pitfalls to Avoid
1. Poor Patient Instruction
If the patient doesn’t understand the maneuver, the results won’t be reliable.
Tip: Take a few extra seconds to coach them through the process and demonstrate it for them.
2. Inconsistent Effort
Without a target, effort varies widely between patients.
Tip: Use goal-directed techniques whenever possible.
3. Imaging Too Early or Too Late
Timing matters.
Tip: Capture Doppler during peak strain, not before or after.
4. Not Comparing to Baseline
A single value doesn’t tell the full story.
Tip: Always compare resting and provoked gradients. Annotate your images well.
Why This Matters for Your Lab
As awareness for hypertrophic cardiomyopathy continues to grow, so does the need for standardized, reproducible protocols.
Goal-directed valsalva helps:
- Reduce variability between sonographers
- Improve confidence in reported gradients
- Align with evolving expectations in echo lab quality and accreditation
Goal-directed valsalva is not just another imaging technique. It’s a huge step toward more consistent and reliable echocardiograms and improved patient care.
Putting It All Together
Across this series, we’ve covered:
- How to recognize HCM
- How to differentiate LVOT obstruction from MR
- How to unmask obstruction using goal-directed valsalva
Each step builds on the last.
And when used together, they transform how HCM is evaluated in the echo lab.
Ready to Go Even Deeper?
If you’d like to see exactly how to build the device, coach the patient, and capture the Doppler changes in real time, our webinar brings this technique to life with real case examples and side-by-side waveform review.
You’ll see:
- Goal-directed valsalva in practice
- Real-time changes in LVOT gradients
- Step-by-step imaging techniques
Goal-Directed Valsalva FAQ
Typically ~40 mmHg for 10 seconds.
To reduce preload and provoke latent LVOT obstruction.
Late-peaking dagger-shaped CW Doppler.

Don Gerig, RDCS, Medical Education Manager
Connect on LinkedIn