Last Updated on January 30, 2024 by Hannes van der Merwe
In an early blog, Abdominal Ultrasound for Echocardiographers: Part 1, we reviewed some basic tips for echocardiographers scanning the abdomen. We reviewed artifacts, image orientation and patient positioning. This week we will provide you with 6 steps to successfully identify the aorta and IVC along with 4 hacks to help you better differentiate arteries and veins. I will walk you step by step through an aorta and IVC ultrasound scan. I will share with you key anatomical landmarks that once you recognize…will make your scanning life a lot easier!
LANDMARKS

Just how important are landmarks in scanning? As evidenced by your immediate recognition of the image of the Statue of Liberty, easy-to-recognize landmarks enable us to know where we are when traveling or describing a location. Similarly, we use landmarks as reference points when scanning. Let’s see how this works in the abdomen.
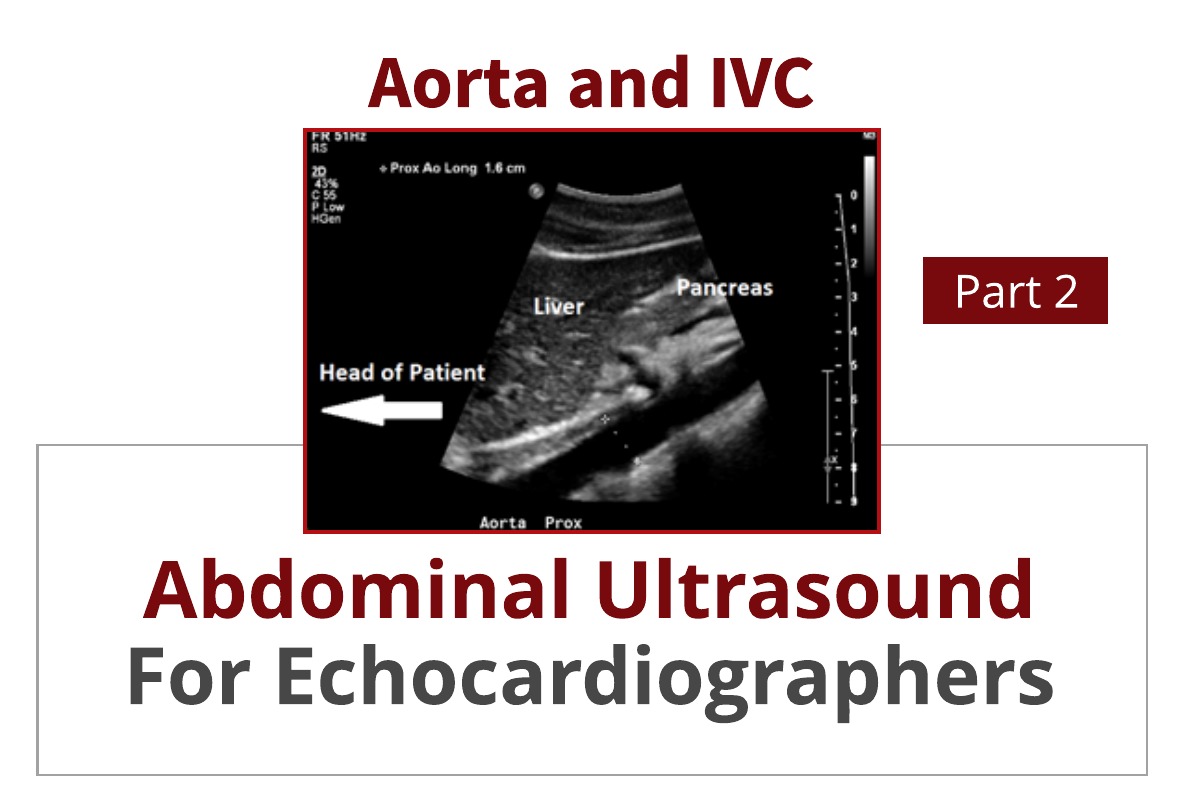
AORTA AND IVC ULTRASOUND
LETS GET ORIENTED
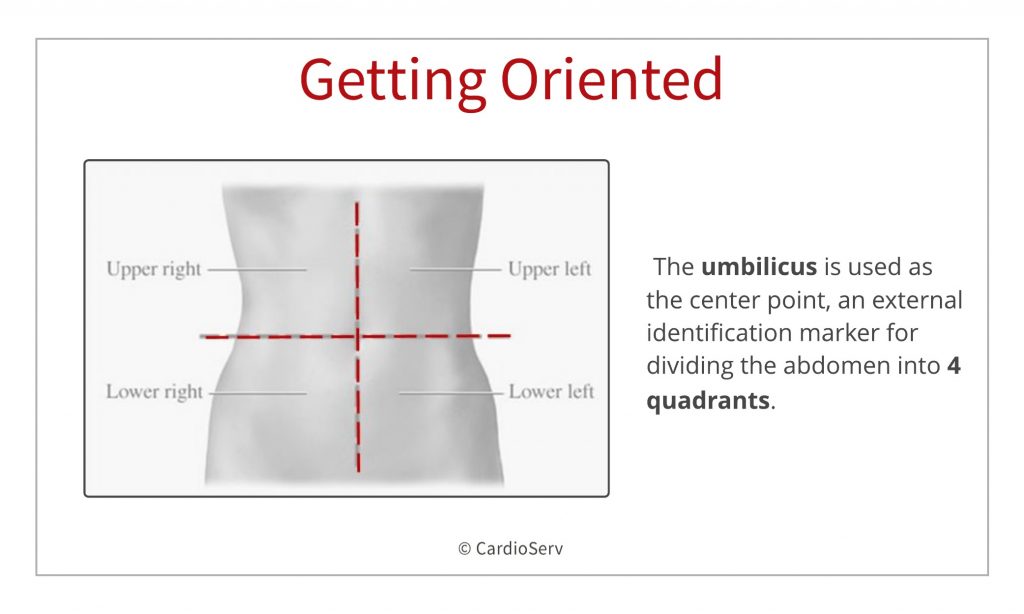
First, let’s take a minute to divide the abdomen into smaller parts. For our purposes, scanning will mainly focus on the midline and right upper quadrant (RUQ) structures. In some instances, we can scan the patient in a right lateral decubitus (RLD) using the left upper quadrant (LUQ) structures as a window to image the aorta, as shown in Part 1 of this blog.
MENTAL REHEARSAL
Before we begin to scan, use your mind’s eye to visualize the aorta inside the body. Which vessel lies to its right? That’s right – the IVC! What else can you see? How deep is the aorta? Where is the spine relative to the aorta?
6 STEPS TO SUCCESSFULLY IDENTIFY THE AORTA AND IVC
STEP 1: TRANSVERSE OR SHORT AXIS
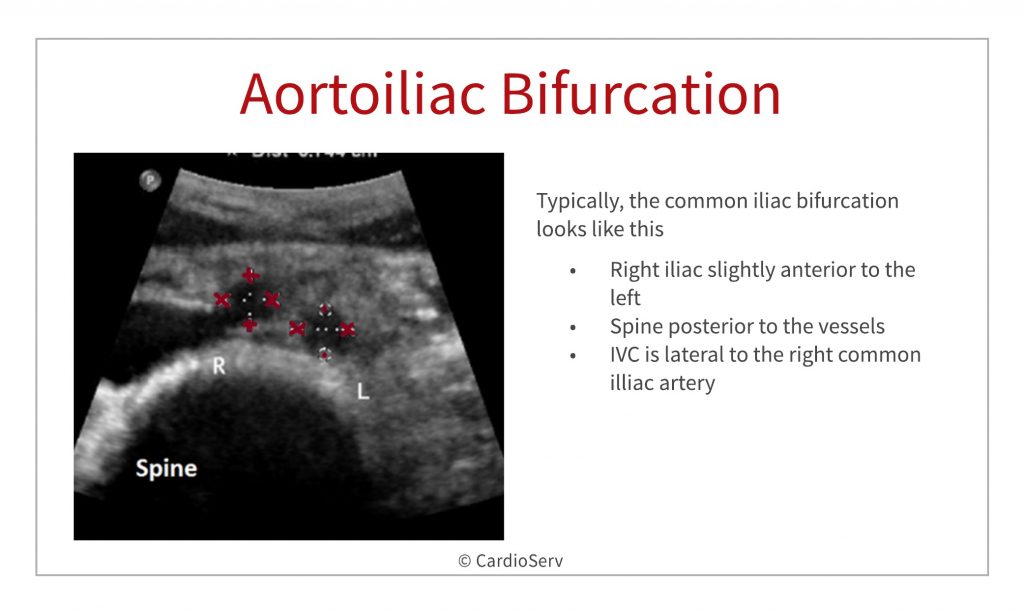
Let’s start scanning transversely (see the image below) from the xiphoid process and move distally to the umbilicus, at which point the aortoiliac bifurcation (see the image below) typically occurs and appears as 2 echolucent “holes”. Then scan superiorly returning to the starting point at the xiphoid process. Also, try having the patient take in a deep breath and hold as you scan to see if this improves the image. The breath hold keeps the abdominal structures “pushed down” while you scan.
This initial survey of the midline abdominal structures should give you the “lay of the land” and an idea of the adjustments you need to make as far as depth, gain, and sector width, etc.
STEP 2: STAYING ON COURSE WITH LANDMARKS
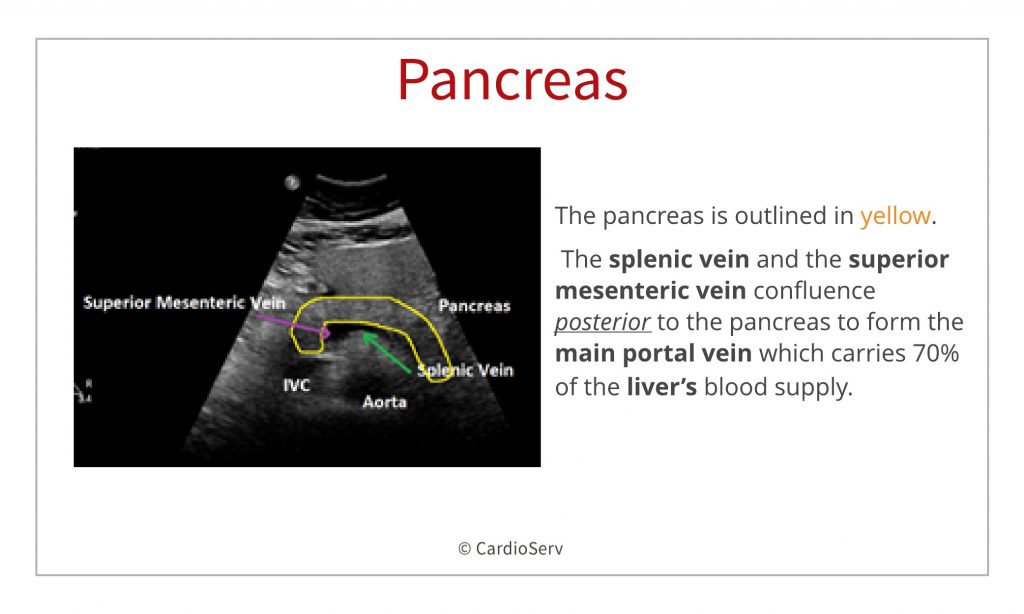
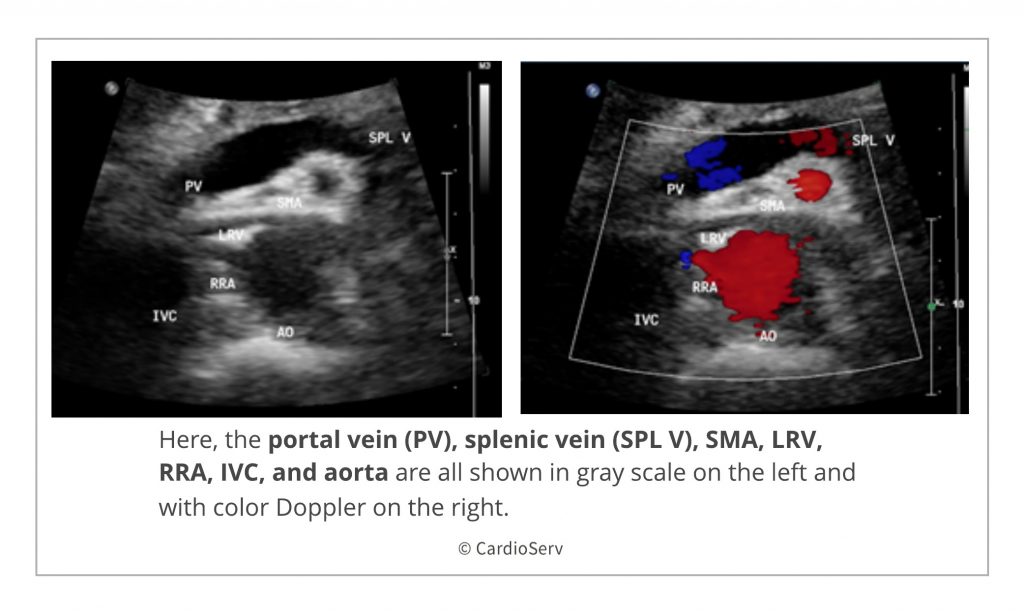
Next, let’s make sure that we are paying attention to our landmarks and not getting off course. In order to correctly identify the abdominal aorta, look for the splenic vein to course longitudinally and anterior to the aorta with the superior mesenteric artery (SMA) sandwiched in between in transverse orientation. The organ anterior to the splenic vein is the pancreas, which has no true capsule and is often difficult to recognize. However, the splenic vein acts as its landmark.
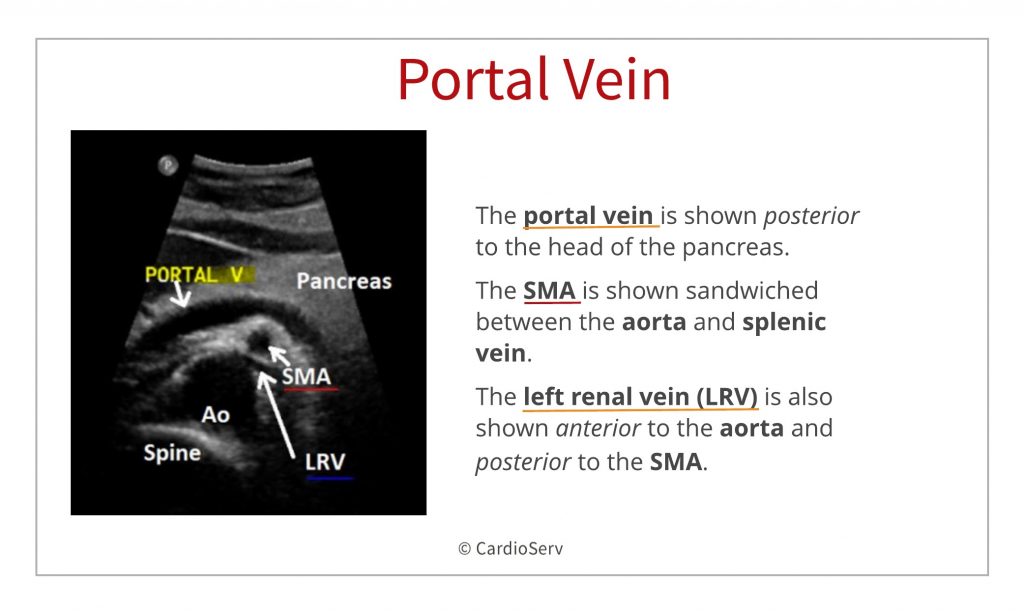
Look at the image below to see that the splenic vein has now joined with the superior mesenteric vein to form the main portal vein.
STEP 3: IDENTIFY THE IVC
Now, try to identify the inferior vena cava (IVC) by scanning just to the right of the aorta. Remember from Part 1, right-sided structures will be displayed on the left side of the image. If you can’t see the IVC, you may be applying too much pressure with the transducer. Try a lighter touch with the transducer to see if the IVC opens up. Also, sometimes it helps to angle the beam towards the liver, which lies in the right upper quadrant (RUQ).
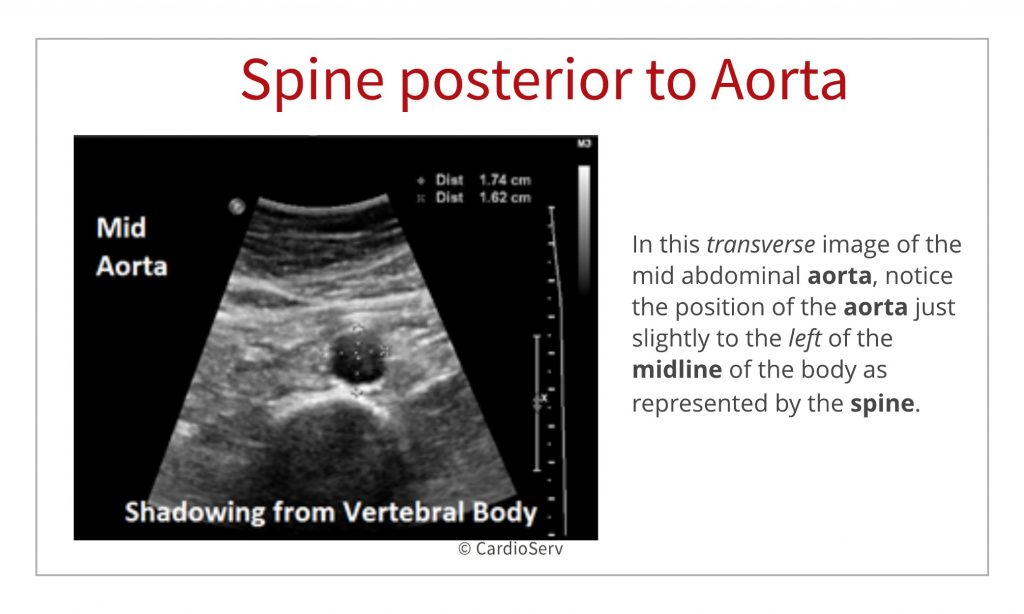
STEP 4: LOCATE THE SPINE
By always noting the spine when you scan the aorta and IVC, you can avoid wrongly identifying abdominal vasculature. Look for the spine to lie posterior to the aorta. See how echogenic the anterior portion of the vertebral body appears and how the shadowing obliterates any further visualization of structures directly behind it. Don’t be fooled into thinking the spine is the aorta with a calcified wall or even a AAA (“Triple A”)!
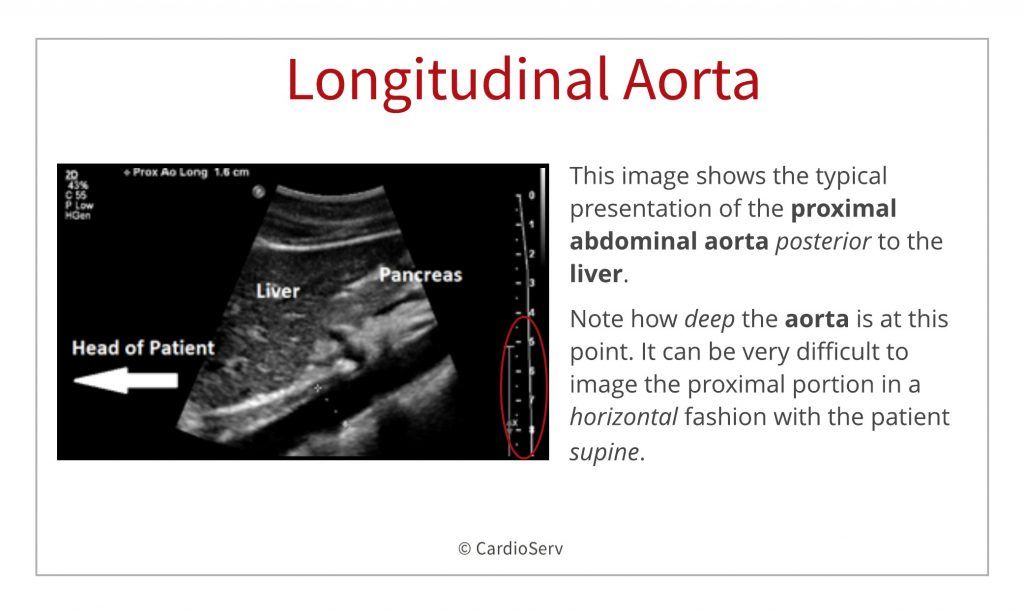
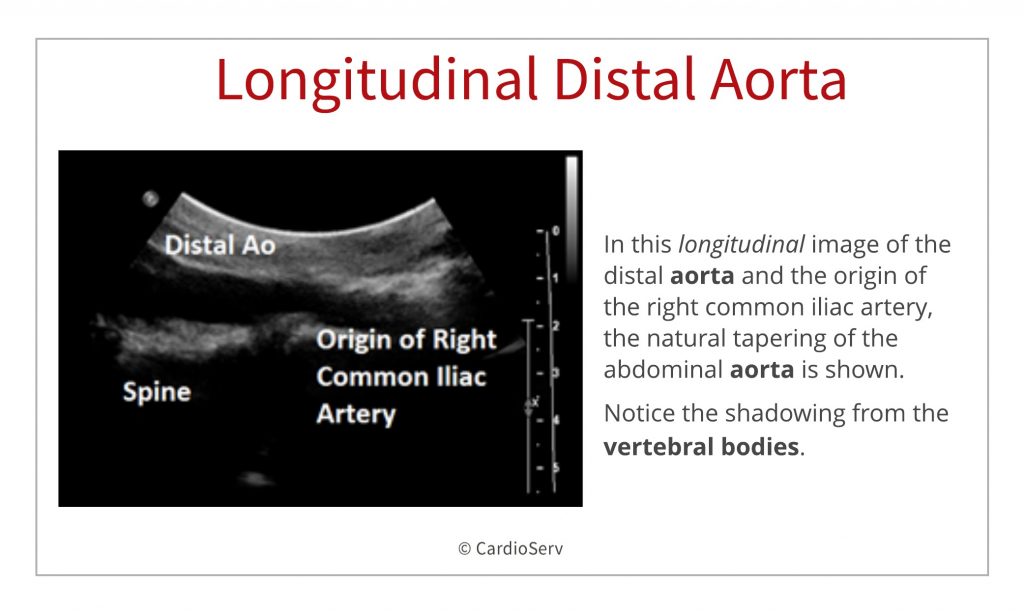
STEP 5: LONGITUDINAL AORTA
Beginning again at the xiphoid process, keep the transducer in the midline, or just slightly to the left, and turn it to a longitudinal, or long axis, plane with the reference marker pointed towards the patient’s head. Scan the length of the aorta from proximal to distal until you reach the aortoiliac bifurcation. Notice as you scan distally, the aorta becomes more superficial or anterior in its location and its diameter tapers before the bifurcation. The lumbar spine remains posterior to the aorta and you can see the echogenic vertebral bodies.
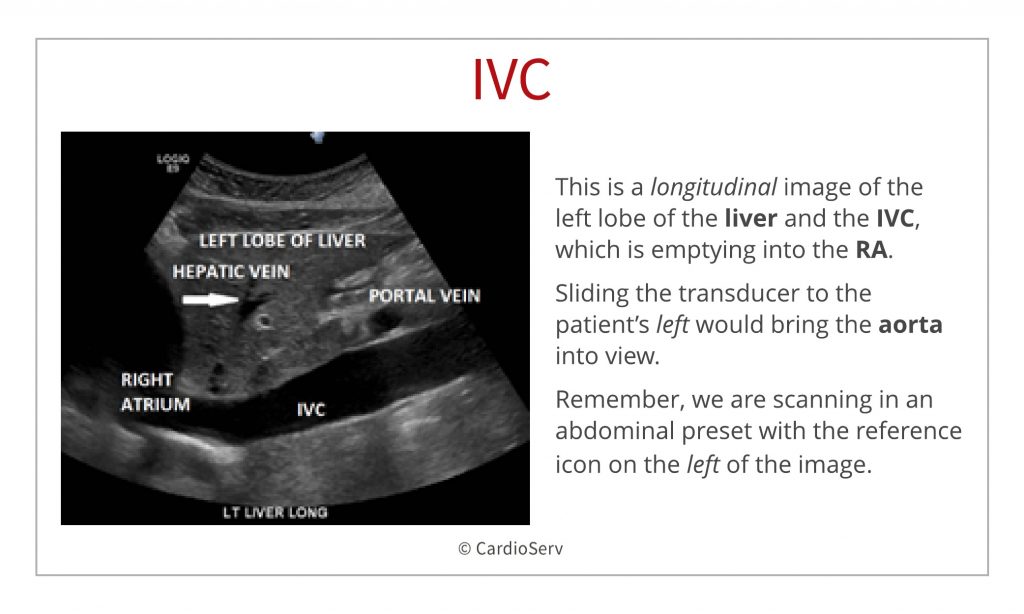
 STEP 6: LONGITUDINAL IVC
Now, identify the IVC in a longitudinal plane by sliding the transducer to the patient’s right. Sometimes this seems like a longer distance than you would expect, given the proximity of the IVC and aorta, but if you have correctly identified the aorta, you will run right into the IVC. In addition, look for the pulsation of the aorta with each heartbeat. You can often feel this pulse through the transducer, especially in thin patients or those with hypertension or an aneurysm. Because the IVC empties into the right atrium (RA), its reactivity reflects the pressure in the RA.
4 ARTERIAL AND VENOUS IDENTIFICATION HACKS!
Do you sometimes get confused when trying to identify the aorta and IVC? Here are some tricks to help you better identify arterial (aorta) versus venous (IVC) structures:
- Arteries have thicker walls which do not compress
- Arteries are under higher pressure
- Veins have thinner walls which do compress
- Veins are under lower pressure
- Pulsations from the heartbeat can be seen in the arteries, and sometimes felt beneath the transducer
- Pulsations from veins ARE NOT NORMAL!
- Proximity – major (deep) veins typically follow a similar course as the arteries
SUMMARY
AORTA AND IVC ULTRASOUND
As sonographers we sometimes need to scan outside of our comfort zone. In this blog series, we are providing echocardiographers with tips and techniques to better scan the abdomen. If you missed part one of this blog series, check it out:
Abdominal Ultrasound for Echocardiographers: Part 1,

Yvonne Prince ACS, RDCS, RVT, RDMS, FASE
Connect on LinkedIn!
We would like to thank our guest writer Yvonne Prince, ACS, RDCS, RVT, RDMS. Check out the Educator Spotlight that introduces Yvonne to our Imaging Community and read some of her latest blogs:
Abdominal Ultrasound for Echocardiographers: Part 1,
Two Ways to Properly Assess TR Jet for Accurate RVSP Calculation
Tips for Accurate Echo Measurement by Applying Geometric Concepts